NOTE: You can buy an ad-free beautifully formatted and concise version (only 7 pages long) of this pattern on my Etsy shop
HERE, or on Craftsy
HERE, or LoveCrochet
HERE. Otherwise, the free pattern is available right here!
Meet Zippy the Baby Sloth! Zippy is a very friendly little sloth. He needs lots of love, so be sure and give him all the cuddles! I had so much fun designing this little guy and I hope you have as much fun making him.

I thought it would be fun to have a short-armed version of the sloth, and a long-armed version. That way if you wanted him to be able to hang around, he could. But since he looks kind of silly with long arms when he's not hanging on something, the short-armed version is just to sit there and look adorable. My personal favorite. So without further ado, here we go!

Here are all the materials needed to make your own little sloth. I used Lion Brand's Vanna's Choice yarn in the colors,
"Toffee" and
"Fisherman". I used 7.5mm eyes for him. You’ll find that this is a rather scarce size and I’ve only been able to find them online at Amazon,
here, or in this Etsy shop, 6060,
here. I would recommend getting them at 6060 since they are a better deal and the ones on Amazon are frequently out of stock. You could also use 6mm eyes for him if you prefer, he just won’t look quite as wide-eyed.
Materials:
-Worsted weight (4 ply) yarn in light brown and cream
-Size E (3.50mm) crochet hook
-7.5mm black safety eyes
-Fiberfill (or your stuffing of choice)
-A small amount of dark brown felt for the eyes & some matching sewing thread
-Scissors
-Stitch marker
-Tapestry/yarn needle
Head (starting with cream yarn)
R1: Ch 7, starting in 2
nd ch from hook, sc 6, turn and sc 6 in the front loops of the chain (12 sts)

This is called a foundation chain and is a great way to start a piece that you want to be more oval than round. After crocheting through the top loops of the chain (pics. 1 & 2), you turn your work around and crochet in the bottom loops of the chain (pics. 3 & 4). The first round is complete! Now you just continue as you normally would.
R2: Inc 1, sc 4, inc 2, sc 4, inc 1 (16 sts)
R3: *Sc 1, inc 1 sc 5, inc 1* rep 2 times (20 sts)
Switch to brown yarn
R4: Sc 1, inc 1 sc 1, inc 5, sc 1, inc 1, sc 1, inc 1, sc 7, inc 1 (29 sts)

Increasing 5 in a row at the top of the head gives him a cute sloping forehead.
R5-7: Sc in all 29 sts (3 rounds total—29 sts)
R8: Sc 1, dec 1, sc 1, dec 5, sc 1, dec 1, sc 1, dec 1, sc 7, dec 1 (20 sts)
R9: Sc in all 20 sts (20 sts)

Cut out two small oval pieces of felt, each about 3/4 inch (4.5 cm) long. Cut small slits in each of the ovals and insert the safety eyes (make sure the slits you make aren't exactly in the middle, but towards the top of the pieces). But do NOT put the safety backings on yet until the eyes are properly positioned on the face and the felt pieces are sewn into place.

Insert his right eye (your left when facing him) between R 2 & 3, where the arrow is pointing. Insert his left eye (your right when facing you) between R 1 & 2 where the other arrow is pointing.

As you see, you should have about 4 1/2 sts between the felt pieces. The face is what makes the sloth cute, so make sure you take your time to get it just right. :)

Now we'll embroider the little nose on, right between the eyes in the middle of the foundation chain. The nose is about 1 1/2 sts wide. Embroider 3-4 sts across using black embroidery floss. Do not attach the safety eye backings until the felt pieces are sewed on.

Using the sewing thread and your needle, neatly sew the felt pieces to the head. You will always need more sewing thread than you think, so start with a long piece. Felt pieces should be at a slight angle, with the bottoms pointing away from each other. Now attach the safety backings.
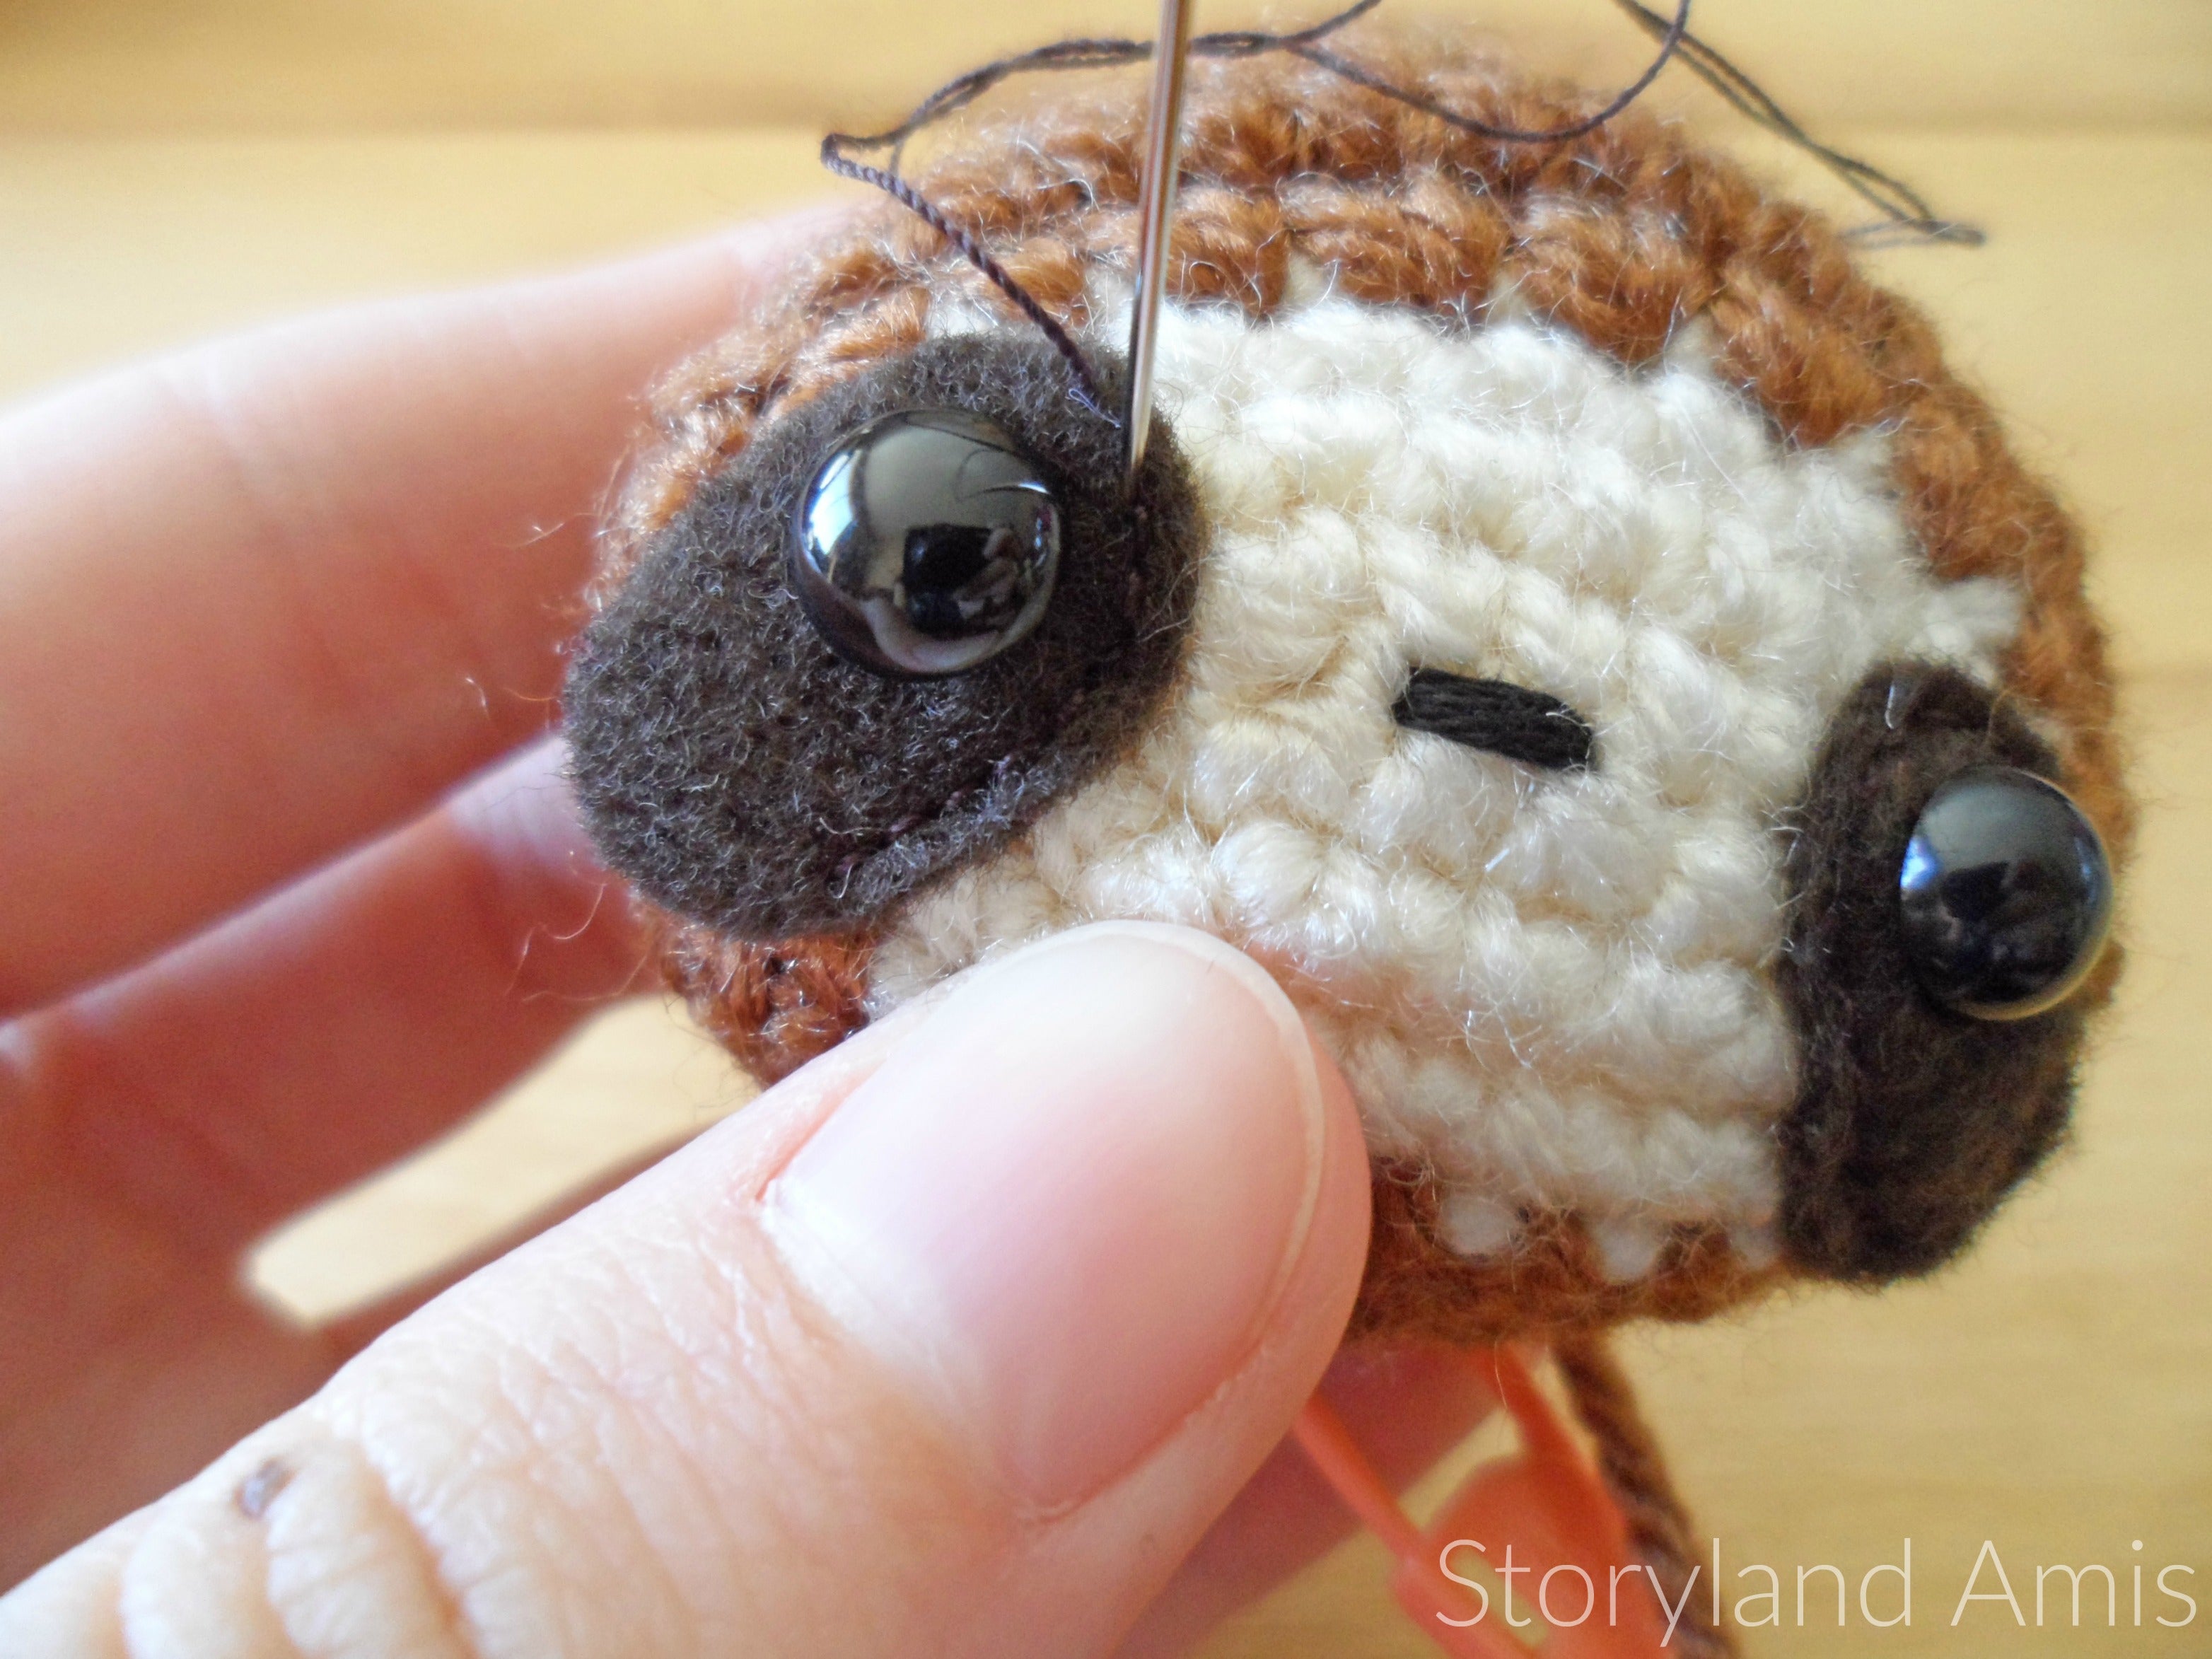
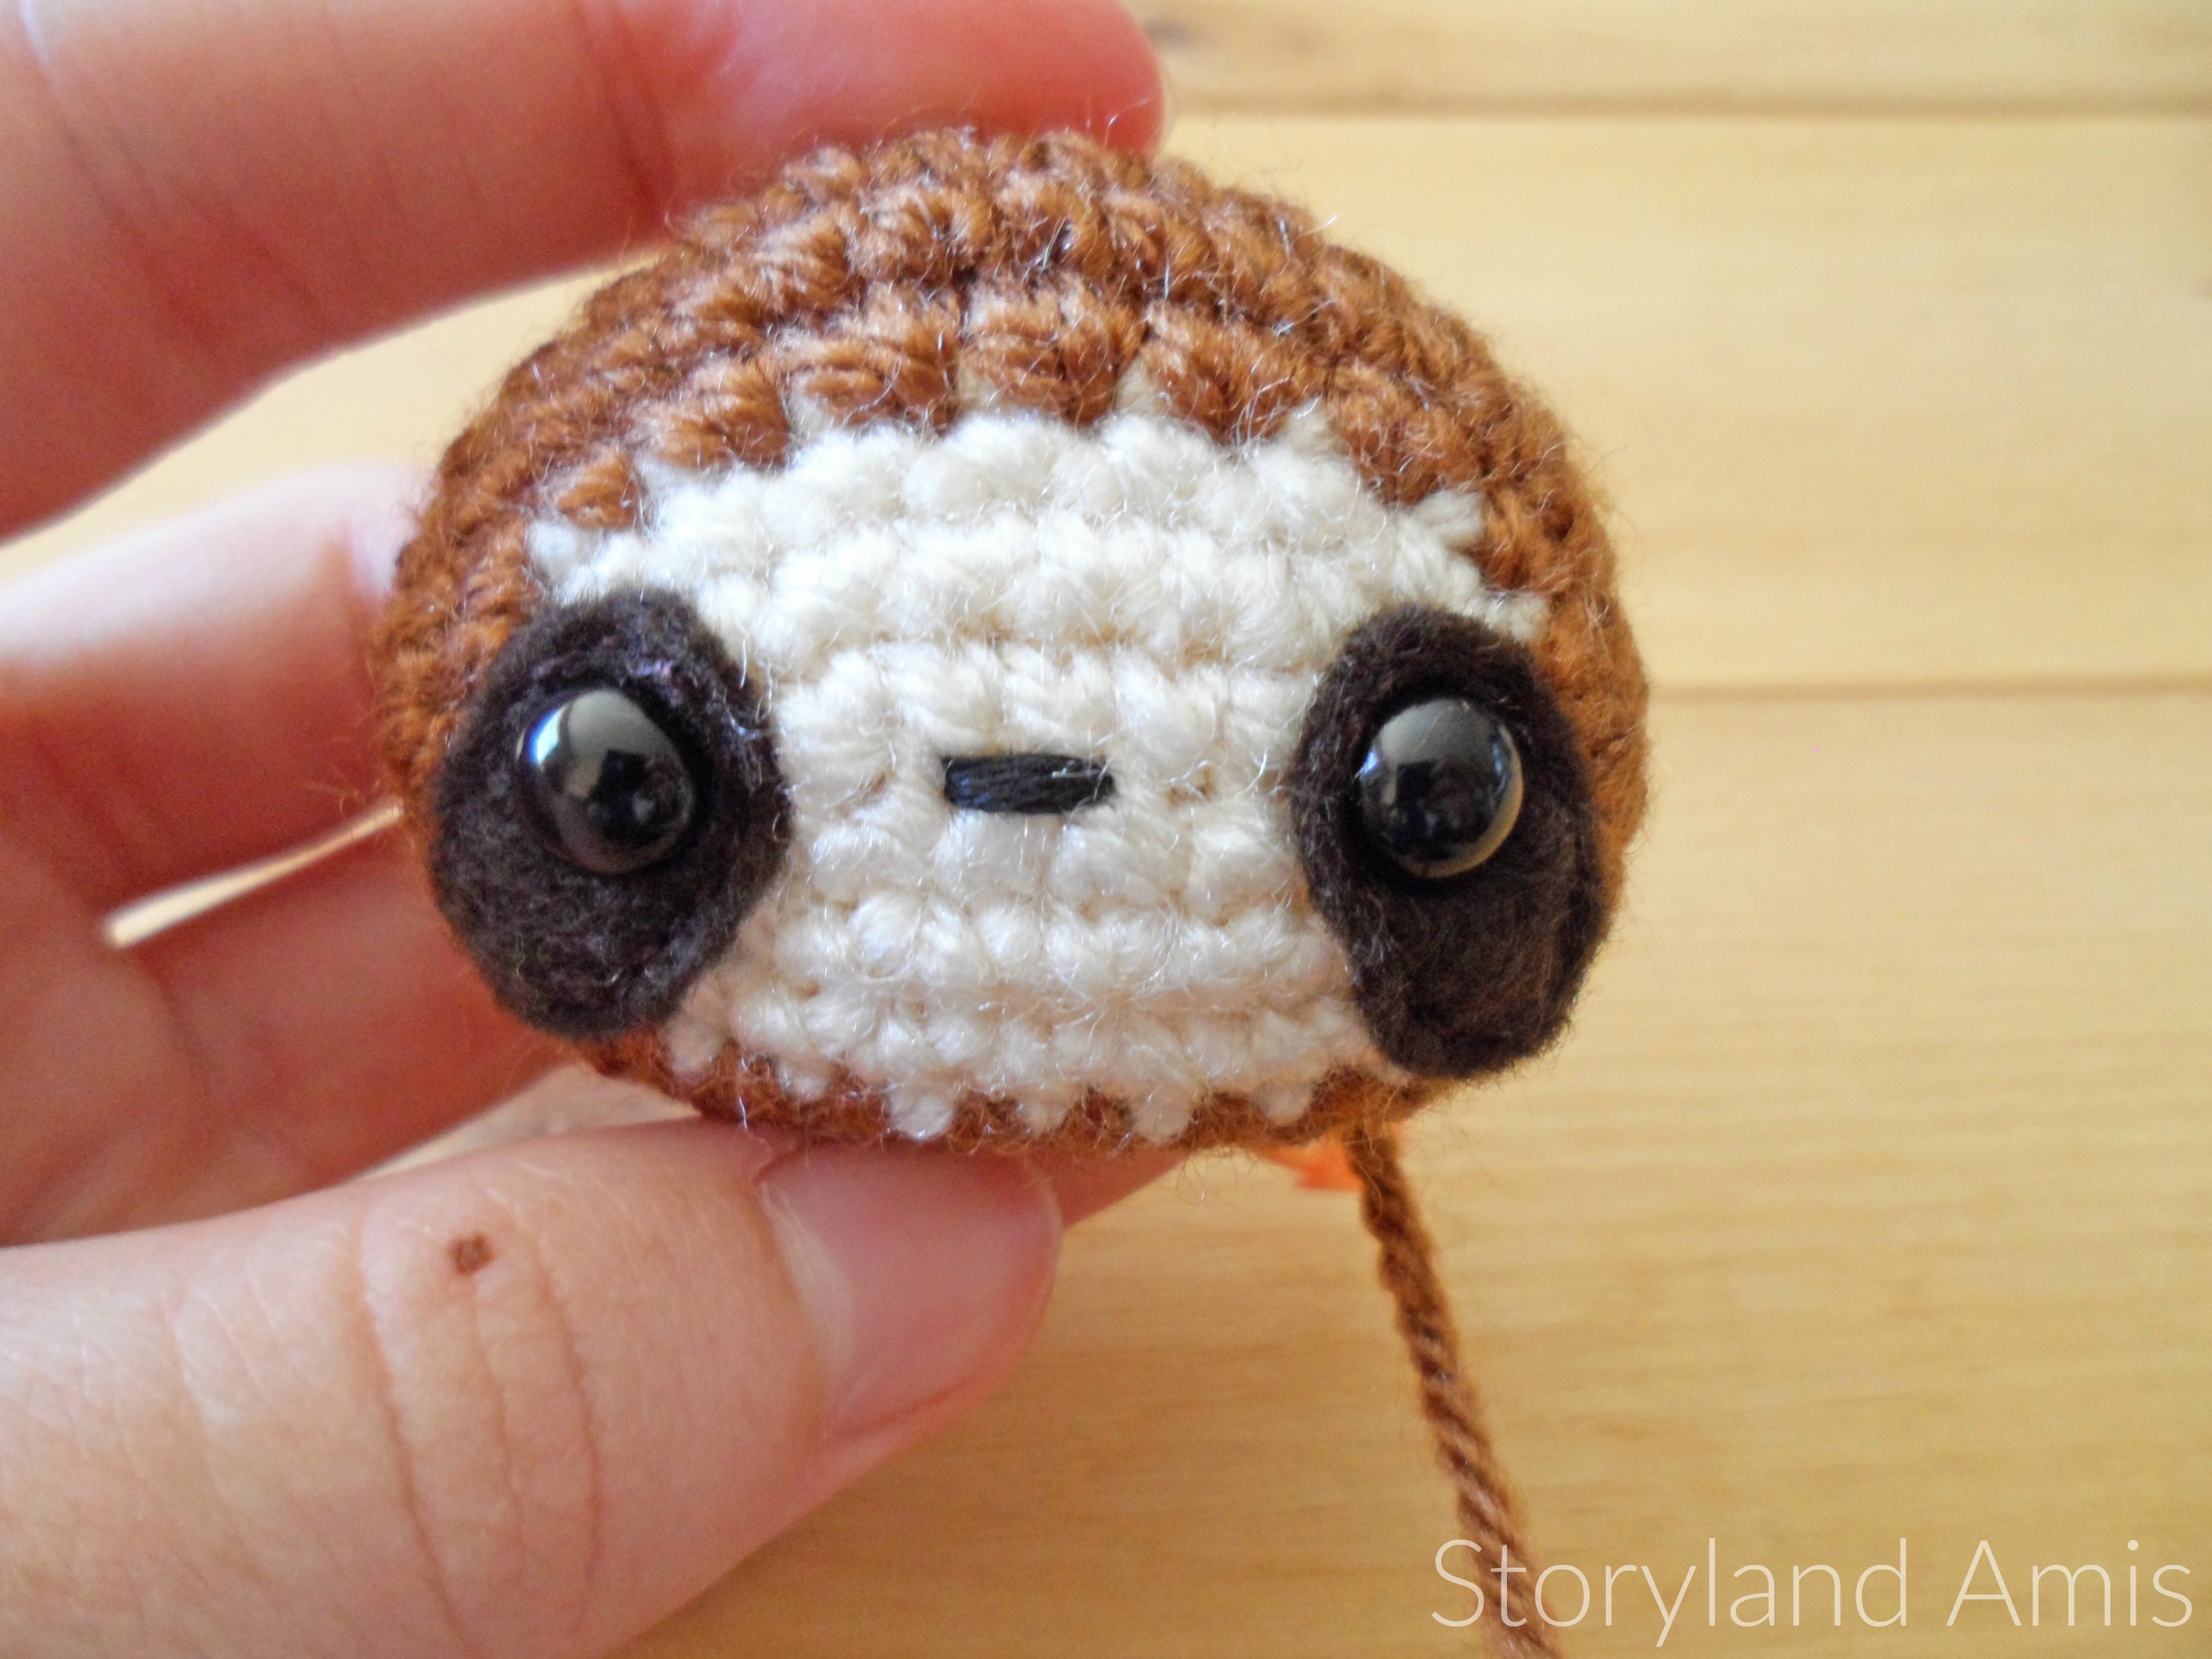
And there you go! The hardest part is over! Now continue crocheting.
R10: *Sc 2, dec 1* rep 5 times (15 sts)
Stop and start stuffing, continuing as you work.
R11: *Sc 1, dec 1* (10 sts)
R13: *Dec 1* (5 sts)
Finish off. Finish stuffing firmly and sew up hole neatly, since this part will be visible.
 Body (using brown yarn)
R1:
 Ch 2, 6 sc in 2
nd ch from hook
R2: *Inc 1* rep 6 times (12 sts)
R3-6: Sc in all 12 sts (4 rounds total-12 sts)
Finish off leaving long tail for sewing. Stuff firmly and sew to head. The body will be positioned the same way for the long-armed sloth as for the short-armed sloth. Refer to the picture at the beginning to get the body positioned just right.
 Arms (for SHORT-armed sloth)
Using brown yarn. Start with a long tail for sewing later.
Ch 4, starting in 2nd ch from hook, sl st 3
Finish off leaving tail for sewing.
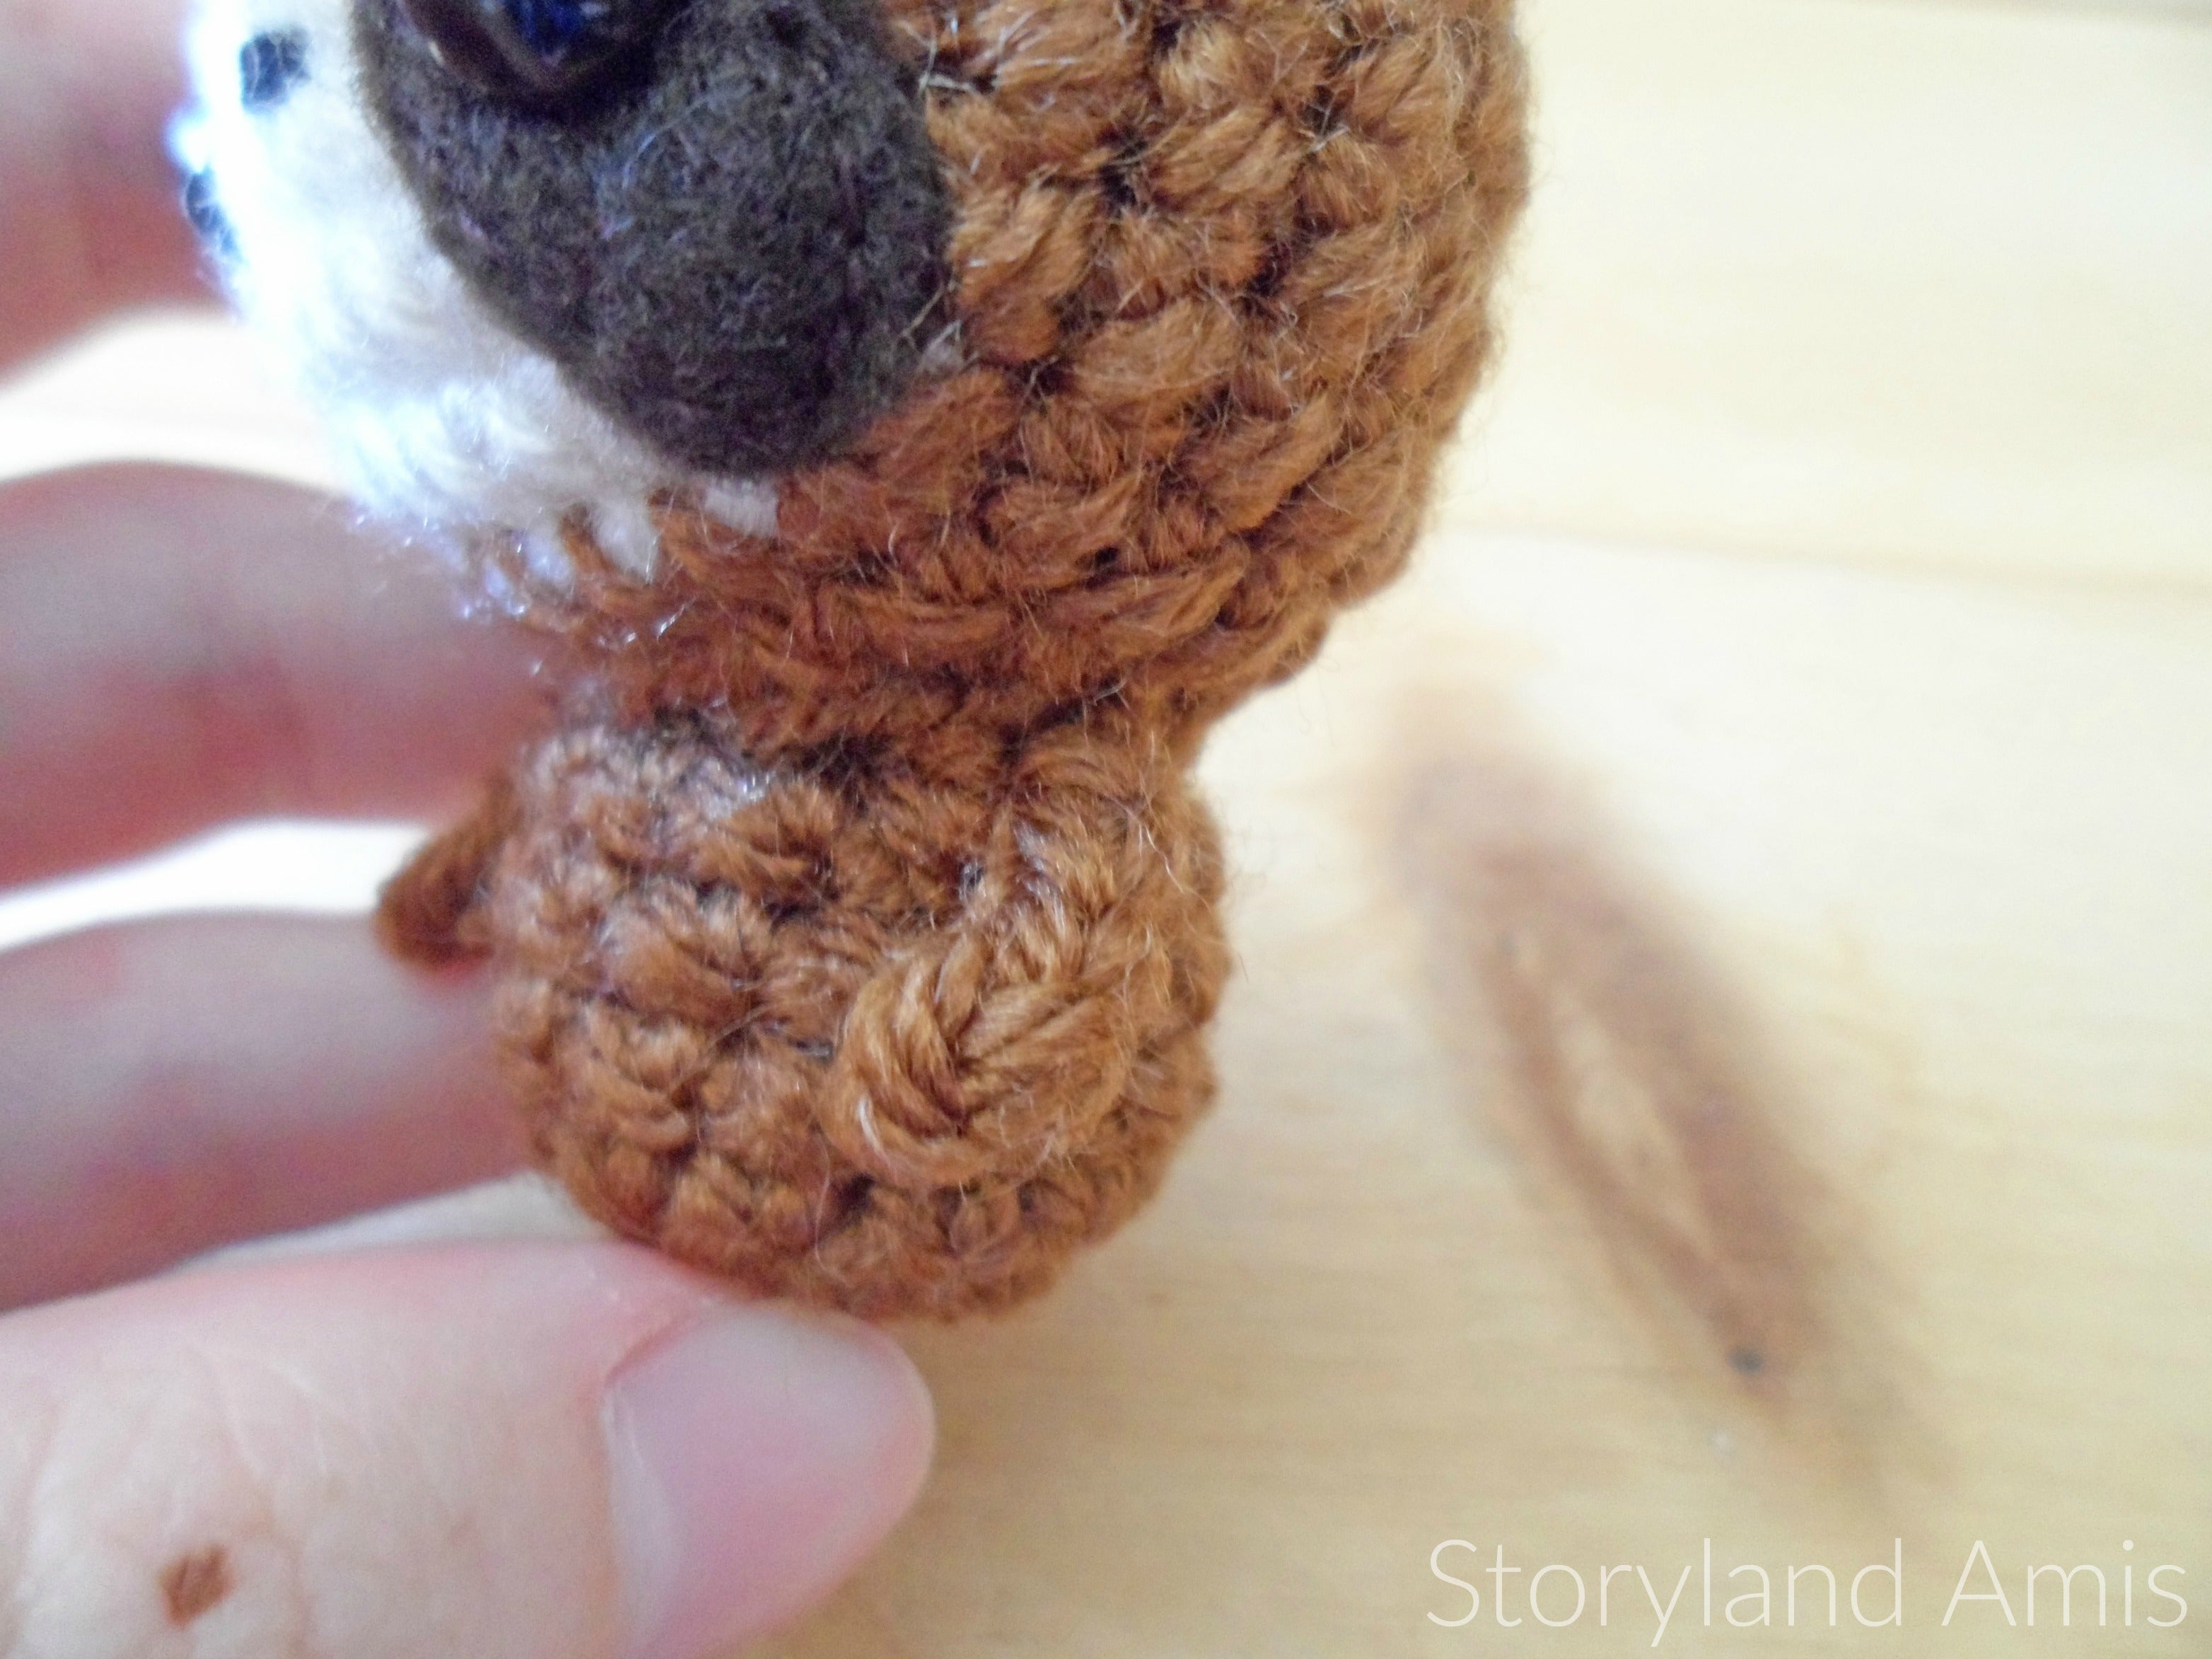
Sew arms onto the sides of the body right up against the neck. When there’s more than one yarn tail on any given piece, usually when you’re working in rows, I like to weave both ends into the body or head. That way there aren’t any ends popping out or fraying like they do when you just cut them.
Legs (for SHORT-armed sloth)
Using brown yarn. Start with a long tail for sewing later.
Ch 3, starting in 2nd ch from hook, sl st 2
Finish off leaving tail for sewing.

Sew the legs onto R 3 & 4 of the body. Weave in all ends.
Arms (for LONG-armed sloth)
Using brown yarn. Start with a long tail for sewing later.
Ch 9, starting in 2nd ch from hook, sl st 8
Finish off leaving tail for sewing.
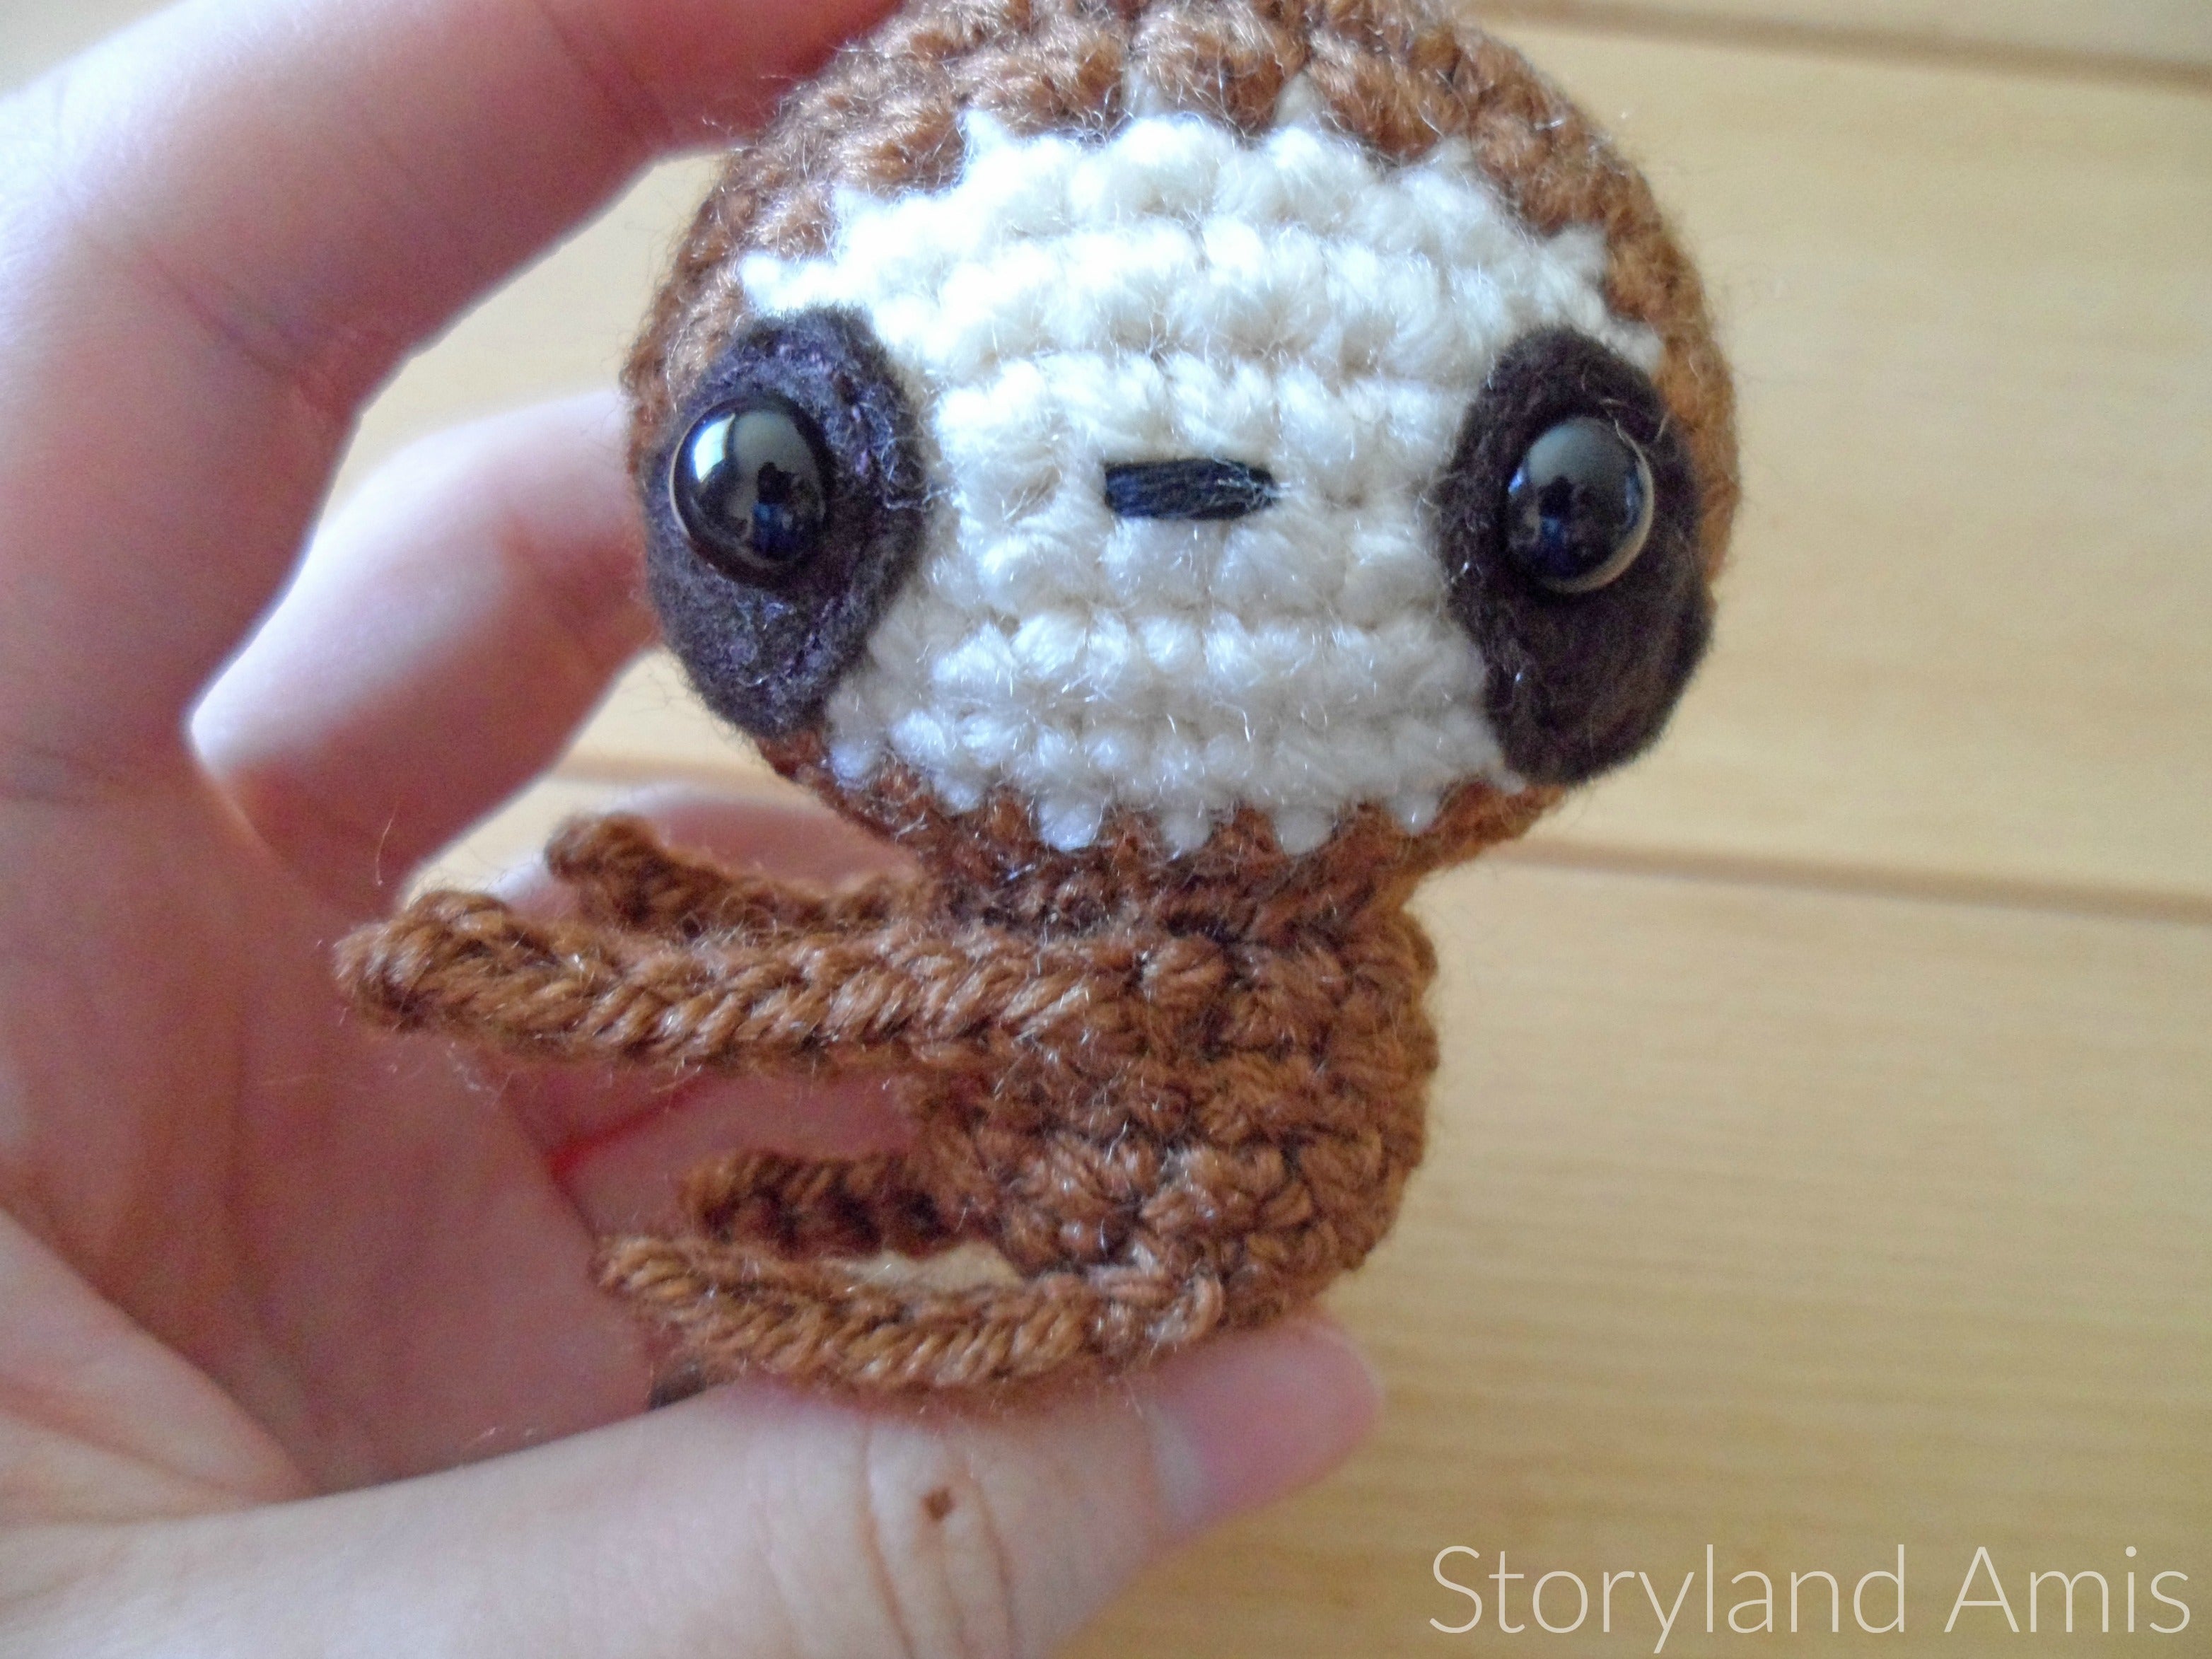
Sew onto the center of the body, under neck. See the picture below to see how to sew his back arm on. Weave in all ends.
Legs (for LONG-armed sloth)
Using brown yarn. Start with a long tail for sewing later.
Ch 7, starting in 2nd ch from hook, sl st 6
Finish off leaving tail for sewing.

Sew the legs onto R 2 & 3 of body. See the picture above this one to see how to position his front leg. Weave in all ends.
To attach Zippy to different things, just take some extra yarn and sew the arms together. Do the same for the legs. Just imagine how cute this little guy would look hanging from all sorts of things!
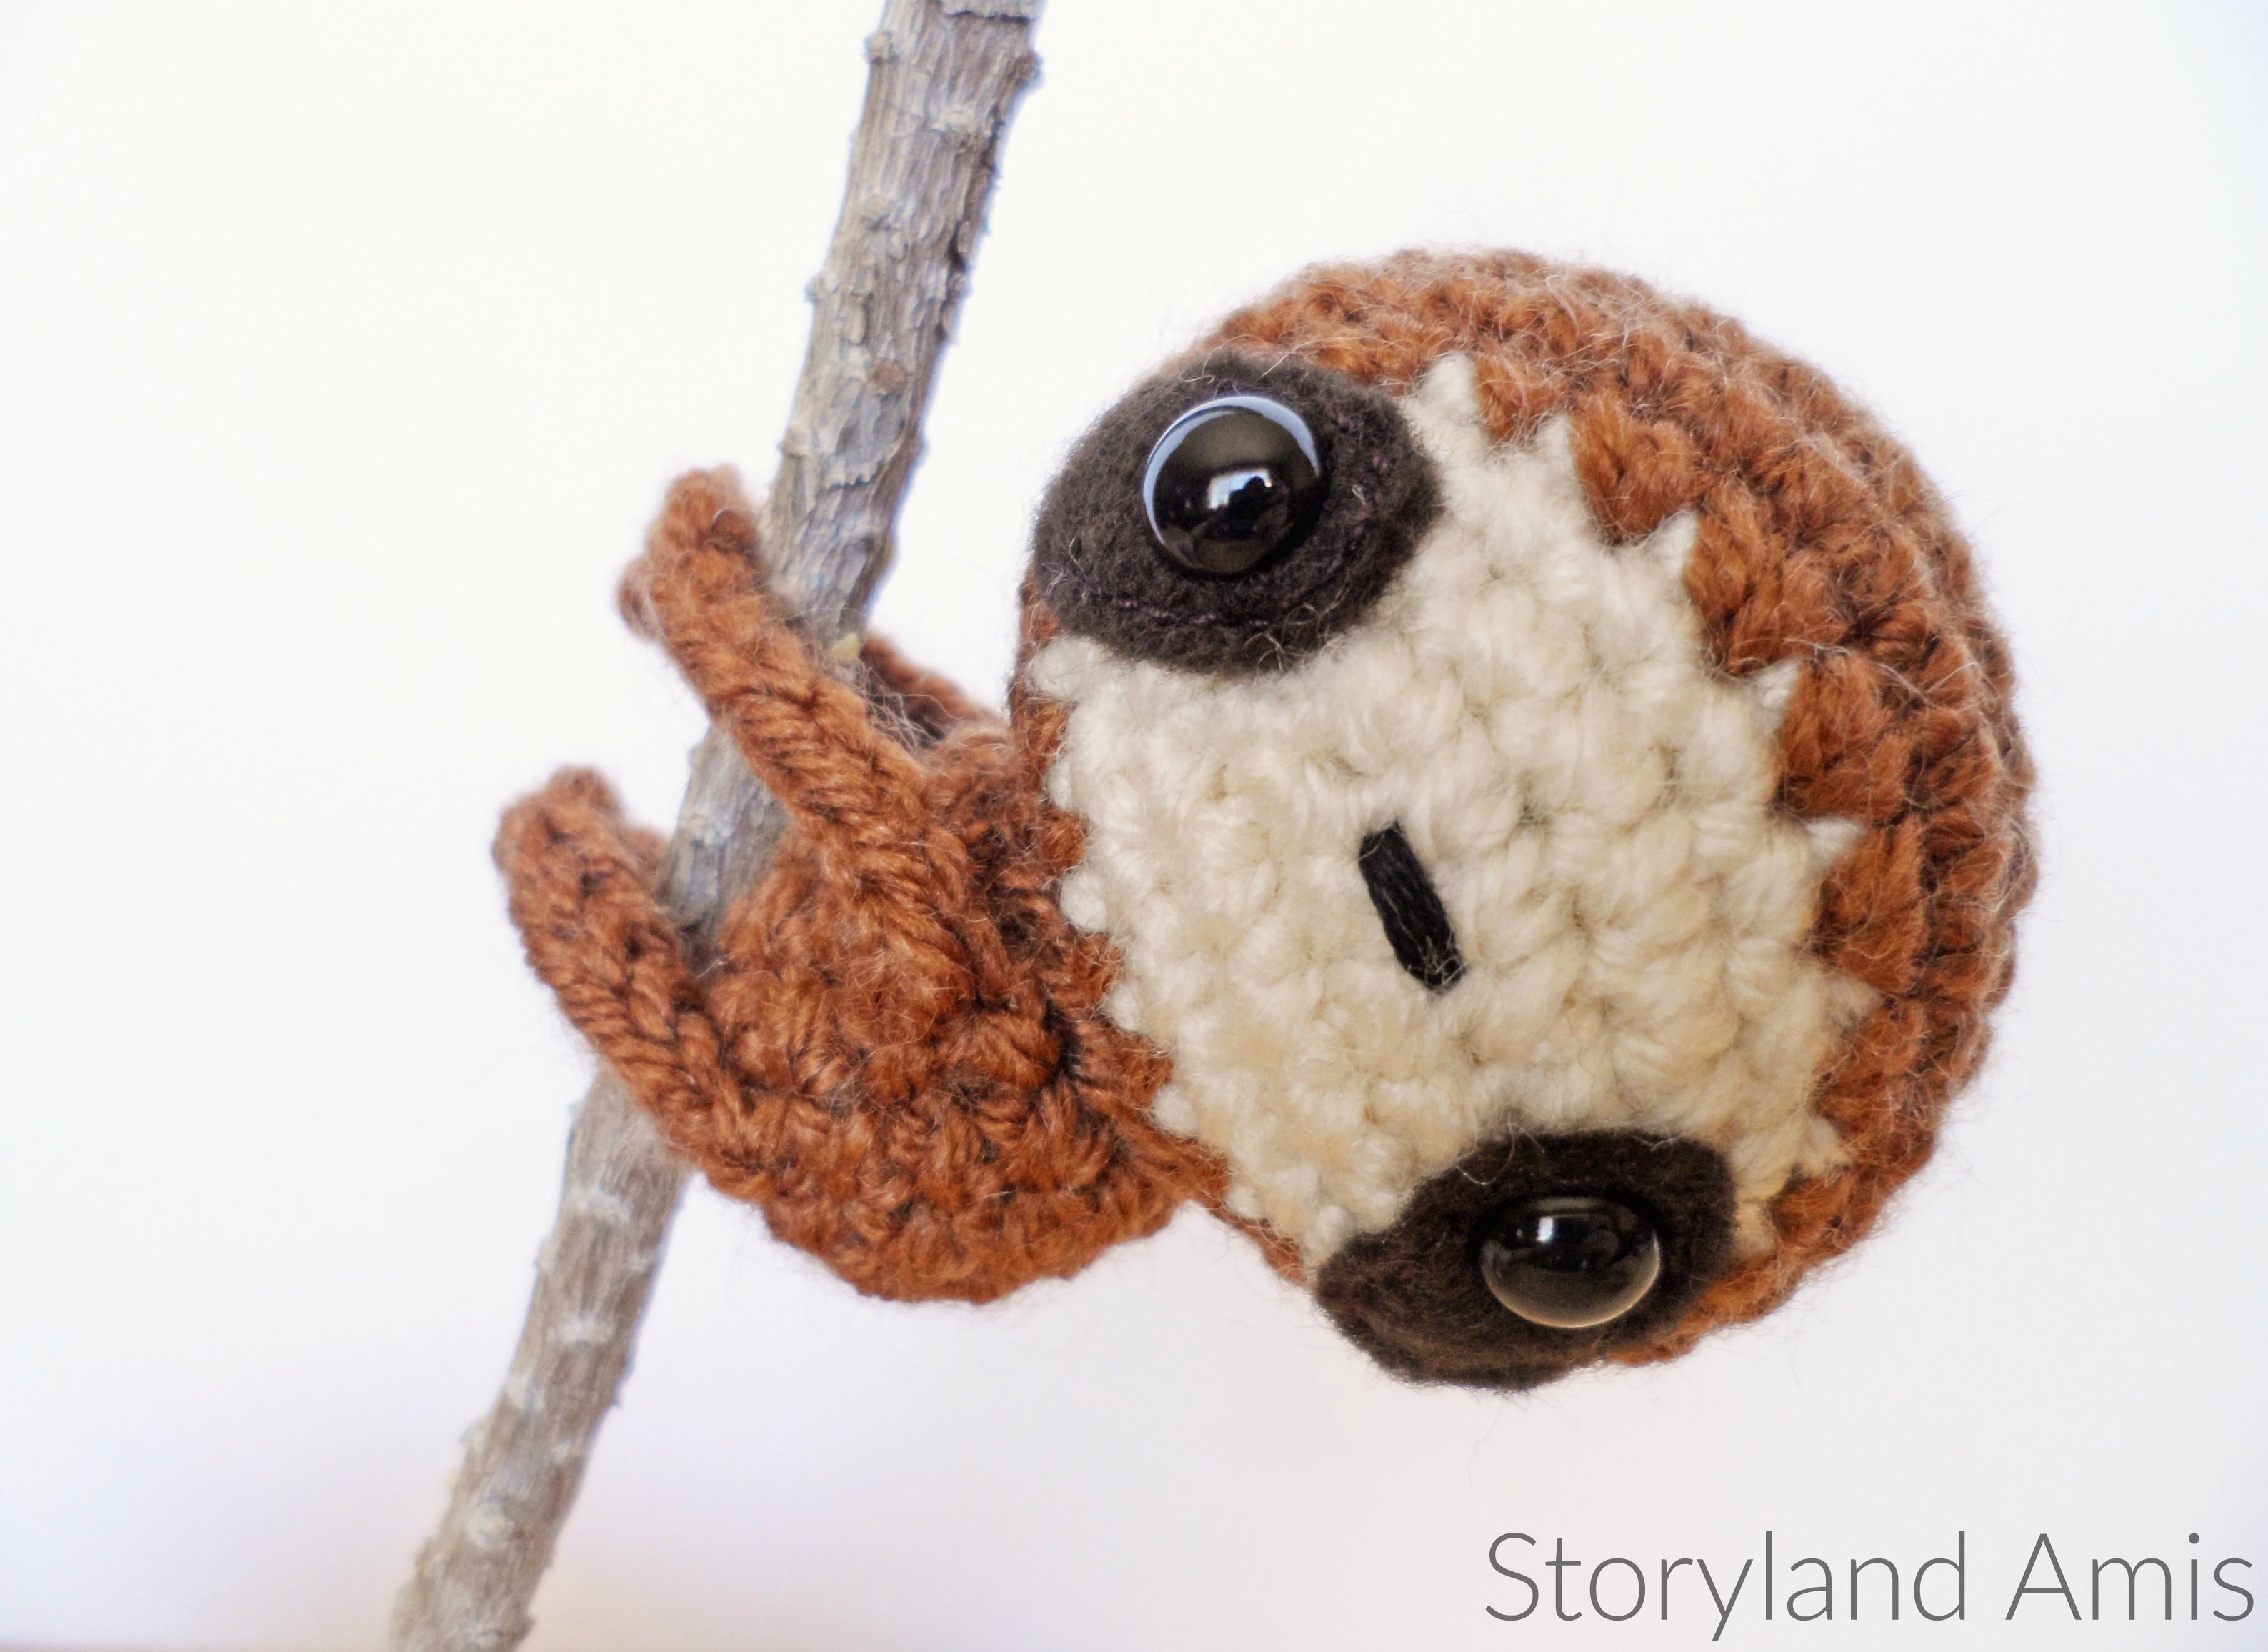

And you're done! I hope you had fun making him! Please share pictures of your project with me through
Instagram,
Facebook, or email (storylandamis@gmail.com). I love seeing what you create!
NOTE: You can buy an ad-free beautifully formatted and concise version (only 7 pages long) of this pattern on my Etsy shop
HERE, or on Craftsy
HERE, or LoveCrochet
HERE.
This pattern is an original design by Storyland Amis. This written pattern is for personal use only. Please do NOT sell or redistribute this pattern in part or in whole. If you wish to share this pattern you may link to this post, but please do not claim it as your own.
You MAY sell the finished product, but please credit Storyland Amis as the designer. If you sell your finished items online I would appreciate it if you’d link back to my blog! You may not mass-produce items made from this pattern. Thank you for your understanding and respect.
~Holly
Follow my blog with Bloglovin
 I thought it would be fun to have a short-armed version of the sloth, and a long-armed version. That way if you wanted him to be able to hang around, he could. But since he looks kind of silly with long arms when he's not hanging on something, the short-armed version is just to sit there and look adorable. My personal favorite. So without further ado, here we go!
 Here are all the materials needed to make your own little sloth. I used Lion Brand's Vanna's Choice yarn in the colors, "Toffee" and "Fisherman". I used 7.5mm eyes for him. You’ll find that this is a rather scarce size and I’ve only been able to find them online at Amazon, here, or in this Etsy shop, 6060, here. I would recommend getting them at 6060 since they are a better deal and the ones on Amazon are frequently out of stock. You could also use 6mm eyes for him if you prefer, he just won’t look quite as wide-eyed.
Materials:
-Worsted weight (4 ply) yarn in light brown and cream
-Size E (3.50mm) crochet hook
-7.5mm black safety eyes
-Fiberfill (or your stuffing of choice)
-A small amount of dark brown felt for the eyes & some matching sewing thread
-Scissors
-Stitch marker
-Tapestry/yarn needle
Head (starting with cream yarn)
R1: Ch 7, starting in 2nd ch from hook, sc 6, turn and sc 6 in the front loops of the chain (12 sts)
 This is called a foundation chain and is a great way to start a piece that you want to be more oval than round. After crocheting through the top loops of the chain (pics. 1 & 2), you turn your work around and crochet in the bottom loops of the chain (pics. 3 & 4). The first round is complete! Now you just continue as you normally would.
R2: Inc 1, sc 4, inc 2, sc 4, inc 1 (16 sts)
R3: *Sc 1, inc 1 sc 5, inc 1* rep 2 times (20 sts)
Switch to brown yarn
R4: Sc 1, inc 1 sc 1, inc 5, sc 1, inc 1, sc 1, inc 1, sc 7, inc 1 (29 sts)
 Increasing 5 in a row at the top of the head gives him a cute sloping forehead.
R5-7: Sc in all 29 sts (3 rounds total—29 sts)
R8: Sc 1, dec 1, sc 1, dec 5, sc 1, dec 1, sc 1, dec 1, sc 7, dec 1 (20 sts)
R9: Sc in all 20 sts (20 sts)
 Cut out two small oval pieces of felt, each about 3/4 inch (4.5 cm) long. Cut small slits in each of the ovals and insert the safety eyes (make sure the slits you make aren't exactly in the middle, but towards the top of the pieces). But do NOT put the safety backings on yet until the eyes are properly positioned on the face and the felt pieces are sewn into place.
 Insert his right eye (your left when facing him) between R 2 & 3, where the arrow is pointing. Insert his left eye (your right when facing you) between R 1 & 2 where the other arrow is pointing.
 As you see, you should have about 4 1/2 sts between the felt pieces. The face is what makes the sloth cute, so make sure you take your time to get it just right. :)
 Now we'll embroider the little nose on, right between the eyes in the middle of the foundation chain. The nose is about 1 1/2 sts wide. Embroider 3-4 sts across using black embroidery floss. Do not attach the safety eye backings until the felt pieces are sewed on.
 Using the sewing thread and your needle, neatly sew the felt pieces to the head. You will always need more sewing thread than you think, so start with a long piece. Felt pieces should be at a slight angle, with the bottoms pointing away from each other. Now attach the safety backings.

 And there you go! The hardest part is over! Now continue crocheting.
R10: *Sc 2, dec 1* rep 5 times (15 sts)
Stop and start stuffing, continuing as you work.
R11: *Sc 1, dec 1* (10 sts)
R13: *Dec 1* (5 sts)
Finish off. Finish stuffing firmly and sew up hole neatly, since this part will be visible.
 Body (using brown yarn)
R1: Ch 2, 6 sc in 2nd ch from hook
R2: *Inc 1* rep 6 times (12 sts)
R3-6: Sc in all 12 sts (4 rounds total-12 sts)
Finish off leaving long tail for sewing. Stuff firmly and sew to head. The body will be positioned the same way for the long-armed sloth as for the short-armed sloth. Refer to the picture at the beginning to get the body positioned just right.
 Arms (for SHORT-armed sloth)
Using brown yarn. Start with a long tail for sewing later.
Ch 4, starting in 2nd ch from hook, sl st 3
Finish off leaving tail for sewing.
 Sew arms onto the sides of the body right up against the neck. When there’s more than one yarn tail on any given piece, usually when you’re working in rows, I like to weave both ends into the body or head. That way there aren’t any ends popping out or fraying like they do when you just cut them.
Legs (for SHORT-armed sloth)
Using brown yarn. Start with a long tail for sewing later.
Ch 3, starting in 2nd ch from hook, sl st 2
Finish off leaving tail for sewing.
 Sew the legs onto R 3 & 4 of the body. Weave in all ends.
Arms (for LONG-armed sloth)
Using brown yarn. Start with a long tail for sewing later.
Ch 9, starting in 2nd ch from hook, sl st 8
Finish off leaving tail for sewing.
 Sew onto the center of the body, under neck. See the picture below to see how to sew his back arm on. Weave in all ends.
Legs (for LONG-armed sloth)
Using brown yarn. Start with a long tail for sewing later.
Ch 7, starting in 2nd ch from hook, sl st 6
Finish off leaving tail for sewing.
 Sew the legs onto R 2 & 3 of body. See the picture above this one to see how to position his front leg. Weave in all ends.
To attach Zippy to different things, just take some extra yarn and sew the arms together. Do the same for the legs. Just imagine how cute this little guy would look hanging from all sorts of things!

 And you're done! I hope you had fun making him! Please share pictures of your project with me through Instagram, Facebook, or email (storylandamis@gmail.com). I love seeing what you create!
NOTE: You can buy an ad-free beautifully formatted and concise version (only 7 pages long) of this pattern on my Etsy shop HERE, or on Craftsy HERE, or LoveCrochet HERE.
This pattern is an original design by Storyland Amis. This written pattern is for personal use only. Please do NOT sell or redistribute this pattern in part or in whole. If you wish to share this pattern you may link to this post, but please do not claim it as your own.
You MAY sell the finished product, but please credit Storyland Amis as the designer. If you sell your finished items online I would appreciate it if you’d link back to my blog! You may not mass-produce items made from this pattern. Thank you for your understanding and respect.
~Holly
Follow my blog with Bloglovin
